
Categories

Arch Acrylic Disks
AD-ARH
$25.10
In stock
1
Product Details
- Using CakeSafe's Acrylic Disks you can achieve perfectly crisp iced edges -
Arch shaped cakes are the latest craze to hit the cake world! This design was created by Eliza of Copper Fork Cakes. She was inspired by architectural arches, historical doorways, and entrances. She also noticed a lot of arch shapes popping up in wedding and event design, too! So she dreamed up a beautiful and unique cake design that would compliment this aesthetic. Read more about Eliza in our interview with her HERE.
Since there are no arch shaped cake pans, you'll use the Acrylic Disks as a guide to cut trim your cake into the arch shape. We are not offering icing thickness sizes since you trim your cake to customize your icing thickness. Read below:
There are a few ways to create this shape out of cake, however Eliza uses two 10 inch square cakes to create the arch shape as
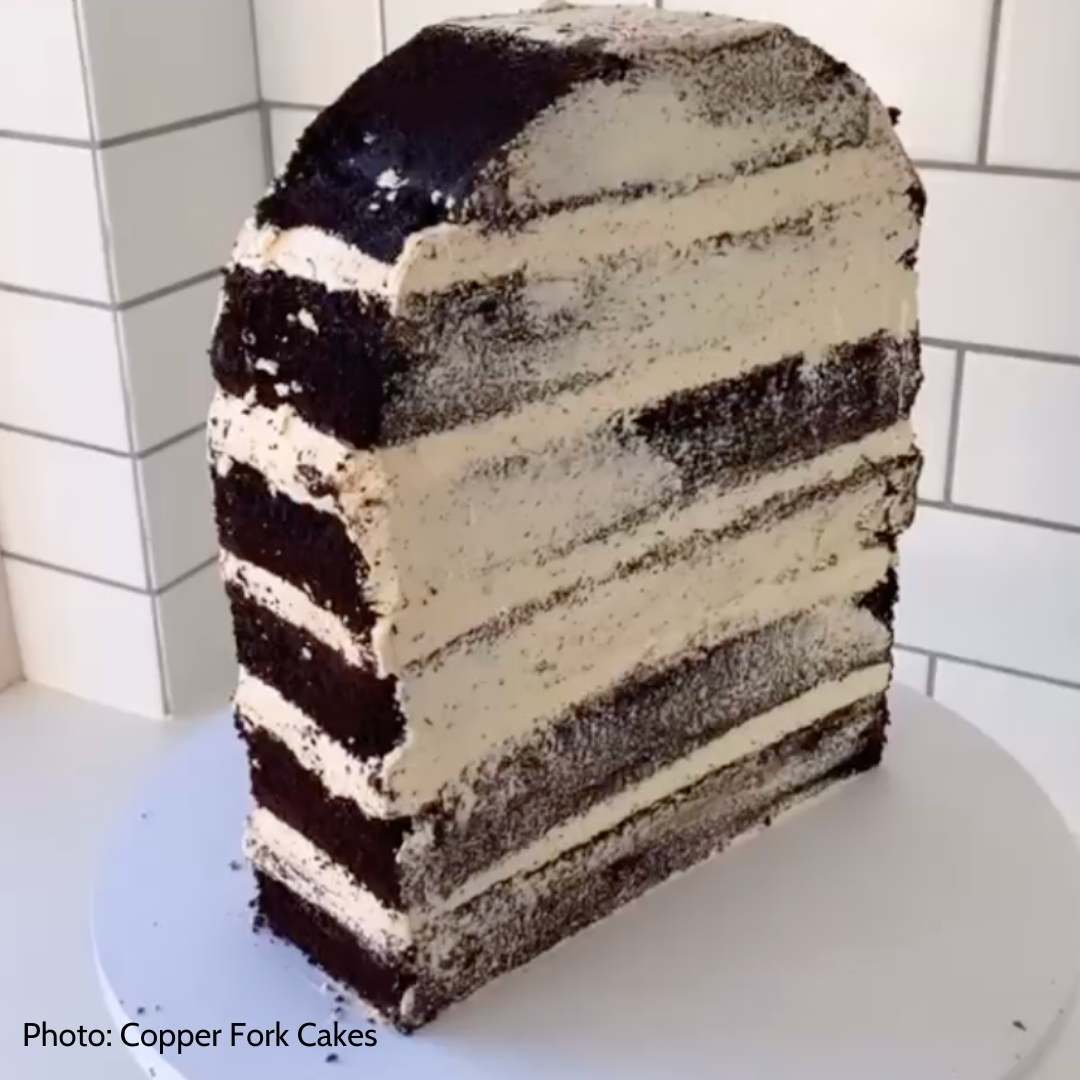
BASIC STEPS:
- Build your cake vertically and use your Arch Acrylic Disks to trim your cake to the perfect arch shape. Don't forget to add at least two dowels running vertically when the arch is standing up.
- Once you have a perfect Arch Shape, trim an additional 1/8 to 1/4 inch around the perimeter depending on your preferred icing thickness.
- Crumb coat and chill the cake.
- Ice with your Arch Acrylic Disks as a guide for smooth and sharp icing. Most bakers do this with the cake still standing vertically. Optionally, you can lay your cake on its side to do this, so one disk is on the bottom and one is on the top. However, make sure your cake has been refrigerated overnight before tipping it on it’s side.
- Chill your cake before removing the Acrylic Disks so it's firm enough to stand up on its own. Optional: Use bamboo skewers as additional dowels to attach your standing cake into the cardboard or foam core cake drum.
Of course there are other ways of accomplishing the arch shape, so feel free to experiment! Eliza also offers a paid Online Course to show you how she creates arch cakes step by step. We highly recommend this course. We are grateful that Eliza has allowed us to offer Acrylic Disks in her original dimensions. Find her on instagram at @copperforkcakes.
Disk Quantity Option:
- We now offer you the choice of purchasing a quantity of 1 disk or 2 disks per size. We always recommend purchasing 2 disks per size to get the most level edges; one disk will go on top of your tier and the other will go underneath it. However some bakers make the choice to only use 1 disk.
Center Hole:
- All of our Acrylic Disks come with 3/8" center holes. Baker use the holes to help them center their cake tiers on the disks by using a temporary dowel as they ice. The holes do not affect the performance of the disks should you choose not to use them.
Save this product for later
Display prices in:
USD